Agendas are very useful tools for structuring meetings. Using agendas, all meeting attendees can prepare for the meeting in advance, knowing what topics will be discussed, and agendas make it easier to stay on topic during the meeting.
While the organizer or co-organizer will often create at least a preliminary agenda when scheduling the meeting, this is not necessary. It is possible to schedule the meeting without an agenda and then add an agenda for the scheduled meeting later. If an agenda still has not been added by the time the meeting is started, the organizer or co-organizer starting the meeting is prompted to create one. However, it still is not necessary to do so.
![]() You cannot create an agenda for a meeting
that has already been initialized and started, but you can edit an existing
agenda during the meeting. For more information, see "Editing
an agenda during a meeting".
You cannot create an agenda for a meeting
that has already been initialized and started, but you can edit an existing
agenda during the meeting. For more information, see "Editing
an agenda during a meeting".
![]() Adding an agenda
makes the meeting much more useful in the MeetingBooster system because
it means that there is much more information to search for and filter
by. For instance, an organization might well have monthly meetings for
all sales staff. Entering a detailed agenda for each monthly sales meeting
makes it much easier to search for information pertaining to that particular
meeting; searching for "Review of US Q3 sales figures", for
example, gives much more precise results than searching for all meetings
with the name "Monthly sales meeting" and having to spend a
lot of time locating the right meeting in the search results.
Adding an agenda
makes the meeting much more useful in the MeetingBooster system because
it means that there is much more information to search for and filter
by. For instance, an organization might well have monthly meetings for
all sales staff. Entering a detailed agenda for each monthly sales meeting
makes it much easier to search for information pertaining to that particular
meeting; searching for "Review of US Q3 sales figures", for
example, gives much more precise results than searching for all meetings
with the name "Monthly sales meeting" and having to spend a
lot of time locating the right meeting in the search results.
 Click
the Agenda tab.
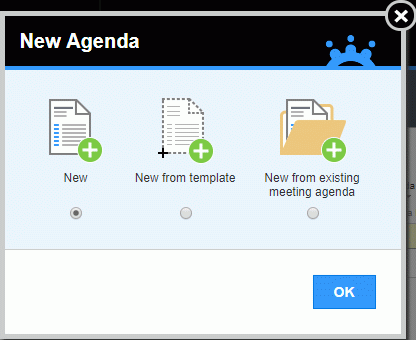
 In
the New Agenda dialog, select
New and click OK.

 Provide
a title and start and end times for the first topic on the agenda, and
specify one or more presenters if desired.
![]() Topic start and end times are useful for
structuring meetings, but they are not mandatory. If you do not provide
start and end times, it has two consequences: Meetings cannot time out
due to inactivity (as described in "Attending
a meeting"), and it is not possible to measure meeting timeliness
for a number of dashboard reports (for more information, see "Working
with dashboards").
Topic start and end times are useful for
structuring meetings, but they are not mandatory. If you do not provide
start and end times, it has two consequences: Meetings cannot time out
due to inactivity (as described in "Attending
a meeting"), and it is not possible to measure meeting timeliness
for a number of dashboard reports (for more information, see "Working
with dashboards").
![]() If the meeting is part
of a meeting series, the agenda editor also includes a Topic
Status column. For more information on using this feature with
a meeting series, see "Using topic
statuses".
If the meeting is part
of a meeting series, the agenda editor also includes a Topic
Status column. For more information on using this feature with
a meeting series, see "Using topic
statuses".
 (Optional)
Select the check box in the Time Lock
column
 ![]() to lock the start and
end times for the topic.
to lock the start and
end times for the topic.
If the topic is locked, its start and end times cannot be changed using the Time Distributor (see "Using the agenda Time Distributor").
 Click
New Topic
 ![]() to insert a new topic after the current topic, and edit it as described
above.
to insert a new topic after the current topic, and edit it as described
above.
 Click
New Sub-Topic
 ![]() to insert a new sub-topic after the current topic.
to insert a new sub-topic after the current topic.
The sub-topic is indented from its parent topic. You can also change topics to sub-topics manually, and vice versa, by indenting and outdenting them; for more information, see "Structuring agenda topics".
 If
a topic is to be deleted, place the cursor in the topic title field, and
click Delete Topic
 ![]() .
.
 The Agenda Shown
button is selected by default, meaning that the attendees can see the
agenda. Click the button to make the agenda invisible to the attendees.
This can be an advantage if the agenda contains sensitive material or
is still in the early planning stages. Click the button again to make
the agenda visible.
![]() Attendees can still provide input for the
agenda even though they cannot see it. For more information on inserting
attendee input, see "Adding
suggestions to an agenda".
Attendees can still provide input for the
agenda even though they cannot see it. For more information on inserting
attendee input, see "Adding
suggestions to an agenda".
![]() You can
also select which individual topics your attendees should be able to see
in the agenda and meeting minutes, and even allow non-attendees to view
agenda topics. For more information, see "Selecting
topic viewing access".
You can
also select which individual topics your attendees should be able to see
in the agenda and meeting minutes, and even allow non-attendees to view
agenda topics. For more information, see "Selecting
topic viewing access".
 Click
New Agenda
 ![]() to delete the current agenda and create a new one for the current meeting.
to delete the current agenda and create a new one for the current meeting.
 Click
Save and Close to save the meeting
with the agenda, or click Cancel
to abort.
For descriptions of more options in the agenda editor, see "Structuring agenda topics", "Adding descriptions to agenda topics", "Adding breaks to an agenda", "Adding attachments and hyperlinks to an agenda", "Adding suggestions to an agenda", "Adding rolling topics to an agenda", "Using topic statuses", "Using the agenda Time Distributor", "Saving an agenda as a template", "Managing agenda approval", "Selecting topic viewing access" and "Sending and printing an agenda".
![]() You can use keyboard
shortcuts to insert, indent and move agenda topics. For more information,
see "Keyboard shortcuts".
You can use keyboard
shortcuts to insert, indent and move agenda topics. For more information,
see "Keyboard shortcuts".
If there are time conflicts in the agenda, a warning icon ![]() will be shown next to the affected topic(s). A meeting can be saved and
run even though there are time conflicts in the agenda, but if you want
to resolve them, you can do so by using the Time Distributor or by editing
topic start and end times manually. For more information, see "Using
the agenda Time Distributor".
will be shown next to the affected topic(s). A meeting can be saved and
run even though there are time conflicts in the agenda, but if you want
to resolve them, you can do so by using the Time Distributor or by editing
topic start and end times manually. For more information, see "Using
the agenda Time Distributor".
If you do not resolve agenda time conflicts, MeetingBooster automatically attempts to do so when you save and close the meeting. This is done by changing topic start times but not topic durations; as a result, one or more topics may overlap, or extend beyond the scheduled meeting end time. Topics that have been time locked as described above, however, are not changed.
You can use the Undo ![]() and Redo
and Redo
![]() buttons to undo or redo unsaved changes to the agenda.
buttons to undo or redo unsaved changes to the agenda.
If there are no changes to undo or redo, the buttons are gray. If there are one or more changes that can be undone or redone, the buttons are blue.
 To
undo the most recent change, click the Undo
![]() button.
button.
 To
undo several changes at once, click the arrow next to the Undo
button and select the changes you want to undo with the mouse.
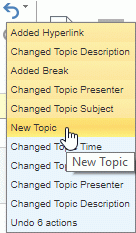
 You
can redo one or more undone changes by using the Redo
![]() button, and the arrow next to it, as described above.
button, and the arrow next to it, as described above.
![]() When you save your agenda, your changes
up to this point can no longer be undone or redone.
When you save your agenda, your changes
up to this point can no longer be undone or redone.
 Click
Columns
 ![]() to select which columns should be visible in the agenda editor.
to select which columns should be visible in the agenda editor.
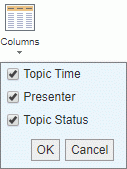
![]() The Topic
Status column is only shown, and can only be hidden, if the meeting
belongs to a meeting series. For more information, see "Working
with meeting series".
The Topic
Status column is only shown, and can only be hidden, if the meeting
belongs to a meeting series. For more information, see "Working
with meeting series".
Templates can be customized to fit the organization's needs and may contain predefined topics and/or durations.
 Click
the Agenda tab.
 In
the New Agenda dialog, select
New from template and click Next.
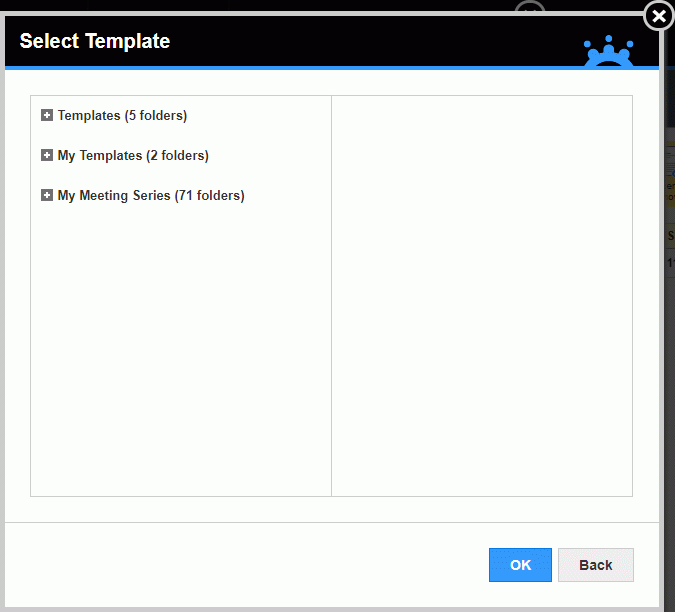
 In
the left pane of the dialog, select the folder where the template is located:
 Templates
contains several standard templates for various business purposes.
 My Templates
contains templates that you have created yourself. For more information,
see "Saving
an agenda as a template".
 My Meeting
Series contains templates shared by all members of the meeting
series you belong to. For more information, see "Working
with meeting series".
 Select the template you want to use in the right pane
of the dialog.
 Click
OK.
 Edit
and save the agenda as described under "Creating
an agenda from scratch" above.
 Click
the Agenda tab.
 In
the New Agenda dialog, select
New from existing meeting agenda
and click Next.
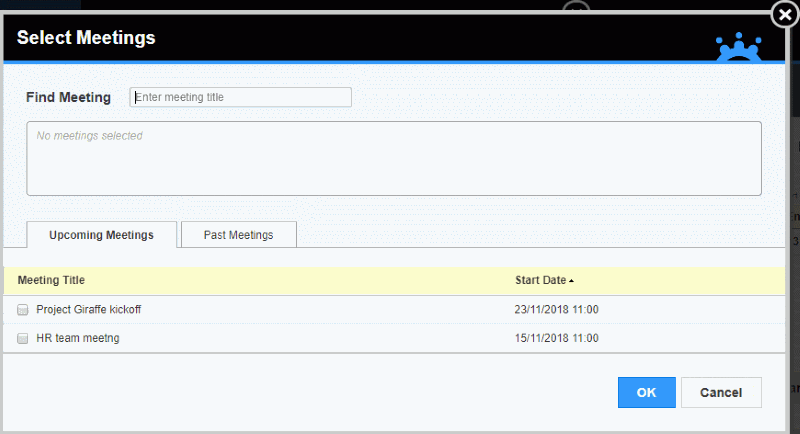
 Search
for the meeting whose agenda you would like to re-use.
You can search for meetings using the search field.
You can view upcoming or past meetings.
 Select
the desired meeting, and click OK.
 Edit
and save the agenda as necessary as described under "Creating an agenda from scratch"
above.