In organizations that regularly schedule and carry out many meetings, the MeetingBooster installation may quickly come to include a vast number of topics in agendas and minutes. With the topic status feature, you can create topic statuses and assign them to your topics as needed. For example, you can mark certain topics as Confidential, or assign them to different parts of your organization. This makes it far easier to find topics using the system search feature or when adding rolling topics to an agenda. (For more information, see "Searching MeetingBooster" and "Adding rolling topics to an agenda".)
![]() Topic statuses are only available for topics that were originally created
in a meeting series. For more information on meeting series, see "Working with meeting series".
Topic statuses are only available for topics that were originally created
in a meeting series. For more information on meeting series, see "Working with meeting series".
Global topic statuses are defined by the administrator; for more information, see "Managing global topic statuses" in the Admin section. If your security roles grant you permission to manage meeting series, you can define topic statuses for any meeting series, and if you are the organizer of a meeting series, you can define topic statuses for that meeting series. For more information, see "Managing topic statuses for a meeting series" below.
You can assign a topic status to any topic created in connection with a meeting series. There are several situations where you can do this:
 While editing the agenda
of a meeting in a meeting series
 While taking notes during
a meeting belonging to a meeting series
 While editing the minutes
of a past meeting in a meeting series
 While editing a meeting
series
You can assign more than one topic status to a topic.
To assign a topic status:
 Locate the Topic
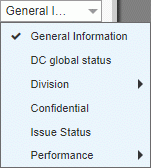
Status drop-down for the topic.
In the agenda editor and on the Topics tab when editing a meeting series, the drop-down is in the Topic Status column.

During a meeting or when editing meeting minutes, the drop-down is located close to the topic title.

 Select the desired topic
status on the drop-down.
For some topic statuses, you must choose an option on a submenu.
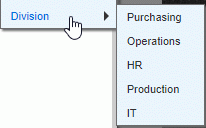
The selected topic status is assigned to the topic, and a check mark is shown on the drop-down next to the selected topic status (or topic statuses, if you have selected more than one).
 To
remove a topic status from a topic, do one of the following:
 Locate
the Topic Status drop-down as
described above, and click the topic status you want to remove, clearing
the check mark.
 During
a meeting, you can also simply click the red cross icon
 ![]() next to the topic status
you want to delete.
next to the topic status
you want to delete.

 Click
Meeting Series in the menu on
the left on the MeetingBooster home page.
 Click
the title of the meeting series required to open it, and select the Topics tab.
 Click
Manage Topic Statuses
 ![]() .
.
 In
the dialog that opens, create, edit or delete topic statuses for your
meeting series as described below.
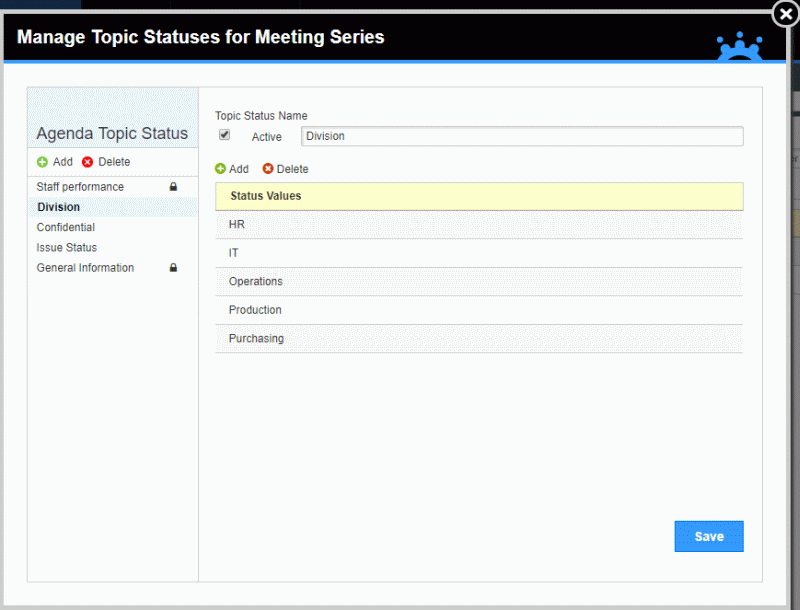
![]() Topic statuses with a lock icon
Topic statuses with a lock icon ![]() are global topic statuses defined in the Admin section. Although you can
use them in the meeting series, you cannot edit or delete them from the
meeting series. If your security roles allow it, you can manage these
global statuses from the Admin section. For more information, see "Managing global topic statuses".
are global topic statuses defined in the Admin section. Although you can
use them in the meeting series, you cannot edit or delete them from the
meeting series. If your security roles allow it, you can manage these
global statuses from the Admin section. For more information, see "Managing global topic statuses".
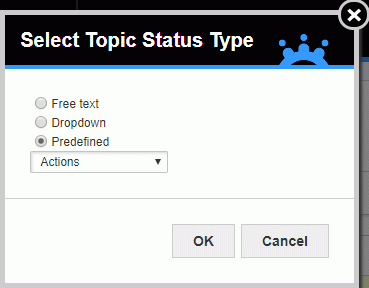
 Click
Add
 ![]() on the
list of agenda topic statuses, and select the desired type in the dialog
that opens.
on the
list of agenda topic statuses, and select the desired type in the dialog
that opens.
For the Predefined topic status type, you must select the desired variant on the drop-down.
 Enter
a name for the new topic status, and select whether it should be active.
If you selected a predefined topic status, it already has a name, but you can change the name if desired.
![]() When a topic status has been
used in your organization, it can no longer be deleted, but you can prevent
further use of the topic status by making it inactive. Making a topic
inactive is also practical if you need to double-check that it is correct
before making it available for use in the organization.
When a topic status has been
used in your organization, it can no longer be deleted, but you can prevent
further use of the topic status by making it inactive. Making a topic
inactive is also practical if you need to double-check that it is correct
before making it available for use in the organization.
 Enter
all other required information, if needed (see below for more information
depending on type), and click Save.
The new topic status can now be used in your meeting series.
![]() When defining topic statuses, use names
and values that make sense to your users and which are easily searchable.
When defining topic statuses, use names
and values that make sense to your users and which are easily searchable.
You do not need to provide any information except for the name.
 Click
Add
 ![]() to add
a drop-down value, and enter the name of the new value.
to add
a drop-down value, and enter the name of the new value.
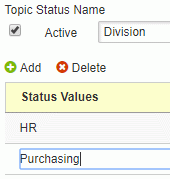
 To
edit or delete a drop-down value, select it and then edit it as needed,
or click Delete
 ![]() .
.
Predefined topic statuses are ready-made topic statuses where you do not need to define anything yourself. Using a predefined topic status that suits your purposes is a quick and easy way of making topic statuses available in your organization. If you do need to customize a predefined topic status, you can edit its name, and you can add, edit and delete the values of the topic status as described above for drop-down topic statuses.
 Select the
topic status you want to edit in the list.
 Edit
the selected topic status, and click Save.
![]() You can only edit topic statuses created for this meeting series, and
you cannot edit global topic statuses created in the Admin section.
You can only edit topic statuses created for this meeting series, and
you cannot edit global topic statuses created in the Admin section.
 Select the
topic status you want to delete in the list.
 Click
Delete
 ![]() .
.
You can only delete topic statuses created for this meeting series, and you can only delete topic statuses that are not in use.