You can quickly and easily add users to the organization's MeetingBooster installation.
![]() Users can also
be imported from comma-separated files, spreadsheets or Active Directory/LDAP
servers. For more information, see "Importing
users".
Users can also
be imported from comma-separated files, spreadsheets or Active Directory/LDAP
servers. For more information, see "Importing
users".
![]() If you use Active Directory to manage
your users, manual user editing will be disabled. For more information,
see "Managing
users using Active Directory".
If you use Active Directory to manage
your users, manual user editing will be disabled. For more information,
see "Managing
users using Active Directory".
![]() Click Settings
Click Settings
![]() and select Admin.
and select Admin.
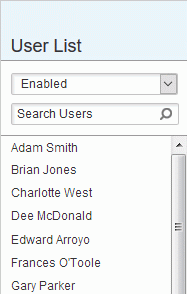
![]() Click
User Management in the menu or
Users in the main window.
Click
User Management in the menu or
Users in the main window.
![]() Click Add
Click Add ![]() under the list of users.
under the list of users.

![]() On
the Details tab, enter all necessary
information on the new user. Fields marked with a red asterisk (
On
the Details tab, enter all necessary
information on the new user. Fields marked with a red asterisk (![]() ) are
mandatory.
) are
mandatory.
![]() The email address must be unique.
The email address must be unique.
![]() The display name does
not need to be unique. However, to avoid confusion, do not use the same
name for more than one user in the organization.
The display name does
not need to be unique. However, to avoid confusion, do not use the same
name for more than one user in the organization.
![]() Deselect
the Send welcome email now check
box if you prefer sending a welcome email manually later. This is a useful
option if, for example, you are creating several users and would like
to double-check security roles for all of them before inviting them to
join MeetingBooster. For more information, see "Managing
user welcome".
Deselect
the Send welcome email now check
box if you prefer sending a welcome email manually later. This is a useful
option if, for example, you are creating several users and would like
to double-check security roles for all of them before inviting them to
join MeetingBooster. For more information, see "Managing
user welcome".
![]() Be aware that until you send
a welcome email or a password reset email, the new user cannot log into
MeetingBooster. For more information on sending a password reset email,
see "Editing users".
Be aware that until you send
a welcome email or a password reset email, the new user cannot log into
MeetingBooster. For more information on sending a password reset email,
see "Editing users".
![]() You can customize the
layout and content of all emails sent from the system as described under
"Customizing
emails".
You can customize the
layout and content of all emails sent from the system as described under
"Customizing
emails".
![]() (Optional)
Click the User Group field and
select a user group for the user in the dialog that opens. For more information
on user groups, see "Managing
user groups".
(Optional)
Click the User Group field and
select a user group for the user in the dialog that opens. For more information
on user groups, see "Managing
user groups".
![]() If no user group is
selected, the new user is automatically assigned to your user group. Your
security role may limit which user groups you can select for the users
you create. For more information, see "Understanding
security roles".
If no user group is
selected, the new user is automatically assigned to your user group. Your
security role may limit which user groups you can select for the users
you create. For more information, see "Understanding
security roles".
![]() (Optional) Click the Manager
field and select a direct manager for the user in the dialog that opens.
For more information on user hierarchies, see "Managing
user hierarchies".
(Optional) Click the Manager
field and select a direct manager for the user in the dialog that opens.
For more information on user hierarchies, see "Managing
user hierarchies".
![]() (Optional) Click the PA
field and select one or more personal assistants (PAs) for the user in
the dialog that opens. A PA can schedule meetings on behalf of the user.
For more information, see "Understanding
user roles" and "Scheduling
from MeetingBooster".
(Optional) Click the PA
field and select one or more personal assistants (PAs) for the user in
the dialog that opens. A PA can schedule meetings on behalf of the user.
For more information, see "Understanding
user roles" and "Scheduling
from MeetingBooster".
![]() When selecting a PA, remember to check that
the PA's security roles give him or her permission to schedule meetings.
When selecting a PA, remember to check that
the PA's security roles give him or her permission to schedule meetings.
![]() (Optional) Click the Security
Roles tab and assign one or more security roles for the user. For
more information, see "Assigning
security roles".
(Optional) Click the Security
Roles tab and assign one or more security roles for the user. For
more information, see "Assigning
security roles".
![]() (Optional) Assign one or more labels to the user. For
more information, see "Working
with user labels".
(Optional) Assign one or more labels to the user. For
more information, see "Working
with user labels".
![]() You can only view and/or enter salary information
for the user if your security role grants you the View Salary and/or Edit
Salary permission. For more information, see "Managing
security roles".
You can only view and/or enter salary information
for the user if your security role grants you the View Salary and/or Edit
Salary permission. For more information, see "Managing
security roles".
![]() Click
Save.
Click
Save.
The new user receives an email with a welcome message and can log on immediately and start using MeetingBooster.
![]() If the user is later made the direct
manager of one or more other users in a user hierarchy, these will be
visible on the Direct Reports
tab. For more information, see "Managing
user hierarchies".
If the user is later made the direct
manager of one or more other users in a user hierarchy, these will be
visible on the Direct Reports
tab. For more information, see "Managing
user hierarchies".