 Free
text labels allow you to enter any text you like when using the labels
in user management.
Free
text labels allow you to enter any text you like when using the labels
in user management.MeetingBooster lets you organize users by user group and set up user hierarchies. While this gives you plenty of options for organizing users, sometimes it may be handy with a third way of organizing and labelling users, especially in large or complex organizations.
The user label feature in MeetingBooster allows you to define any number of user labels that you can use to group users, or add extra fields to store information about particular users. The labels are shown on the Details tab for each user under User Management; when editing users, you can use them as necessary. For more information on setting up and editing users, see "Adding users" and "Editing users".
If you enable user labels for filtering (see below), you can quickly and effectively filter users when running reports on the Dashboards tab. For more information, see "Working with dashboards".
There are two types of label: free text labels and drop-down labels.
 Free
text labels allow you to enter any text you like when using the labels
in user management.
 Drop-down
labels provide you with a drop-down list of options that you can select
during user management.
 Click Settings
![]() and select Admin.
and select Admin.
 Click
User Labels in the menu.

 Click
Add
 ![]() .
.

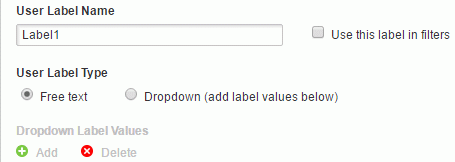
 Enter
a name for the label.
 Select Use this label
in filters if the label is to be used for filtering dashboard reports.
 Select
Free text.
 Click
Save.
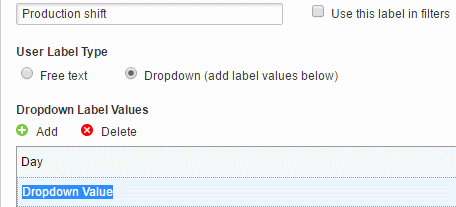
 Select
Dropdown. The Add
and Delete buttons become active.
 Click
Add
 ![]() to add
a drop-down value, and enter the value in the blue editing field.
to add
a drop-down value, and enter the value in the blue editing field.

 (Optional)
Add more values.
 (Optional)
Delete existing values by selecting them and clicking Delete
![]() .
.
 Click
Save.
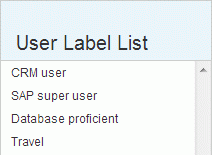
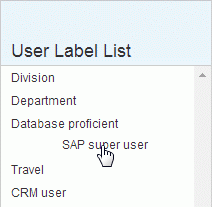
The order in which the labels are displayed on the User Labels page defines the order in which they are shown on the User Management page. You can change the order of the labels by using drag and drop.

 Click
the label to be moved, and drag it to the desired position on the list.
When adding or editing a user, you can now use the labels to enter additional information as follows:
 For
free text labels, enter text in the label field.

 For
drop-down labels, select an option on the drop-down.

![]() Remember to click
Save after adding or updating
a user.
Remember to click
Save after adding or updating
a user.
 Select
the label to be deleted on the User Labels
page.
 Click
Delete
 ![]() , and
confirm the deletion in the dialog that opens.
, and
confirm the deletion in the dialog that opens.
![]() All user data
associated with the label will also be deleted.
All user data
associated with the label will also be deleted.