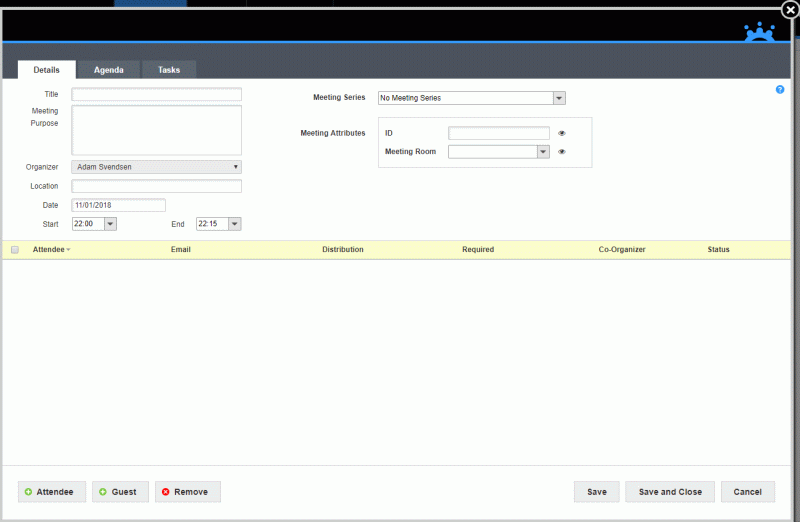
 Click
New Meeting in the menu on the
left on the MeetingBooster home page.
 Click
New Meeting in the menu on the
left on the MeetingBooster home page.

 Enter
the title of the meeting.
![]() Use a
meeting title that is meaningful to all attendees and other involved parties.
In many organizations, lists of meetings may quickly become very long,
making it difficult to identify meetings correctly if they do not have
meaningful titles. This is especially the case with recurring meetings;
for more information, see "Scheduling
a recurring meeting".
Use a
meeting title that is meaningful to all attendees and other involved parties.
In many organizations, lists of meetings may quickly become very long,
making it difficult to identify meetings correctly if they do not have
meaningful titles. This is especially the case with recurring meetings;
for more information, see "Scheduling
a recurring meeting".
 (Optional)
Enter a meeting purpose and a location for the meeting.
![]() The meeting purpose and location information
is shown in the meeting minutes after the meeting.
The meeting purpose and location information
is shown in the meeting minutes after the meeting.
 (Optional)
If you are the personal assistant (PA) of another user, and you need to
schedule the meeting on behalf of that user, select the user on the Organizer drop-down.
 Select
a date and start and end times for the meeting.
If there may be a conflict with the start
time selected, a warning icon ![]() is shown.
is shown.
 (Optional) Select a meeting series for the meeting.
If you select a meeting series, a dialog is shown asking if you want to add all members of the meeting series to the meeting.
![]() You can only select a meeting series if
you are a member of that meeting series with permission to create meetings
or if your security roles grant you permission to manage meeting series.
For more information, see "Working
with meeting series", "Understanding
security roles" and "Managing
security roles".
You can only select a meeting series if
you are a member of that meeting series with permission to create meetings
or if your security roles grant you permission to manage meeting series.
For more information, see "Working
with meeting series", "Understanding
security roles" and "Managing
security roles".
 Set
meeting attributes for the meeting, if this feature is used in your organization.
For more information, see "Setting
meeting attributes".
 Click
+ Attendee
  ,
select the desired attendees on the list, and click OK to add them to
the meeting. You can also click + Guest
 to invite one or more guests
to the meeting. For more information, see "Inviting
attendees".
If the selected meeting time conflicts with the schedule of one or more of the selected attendees, a warning dialog is shown. For more information, see "Inviting attendees".
 (Optional)
Click the Agenda tab to add an
agenda to the meeting. For more information, see "Creating
an agenda".
![]() It is possible to schedule
the meeting without an agenda and then add an agenda for the scheduled
meeting later. If an agenda still has not been added by the time the meeting
is started, the organizer or co-organizer starting the meeting is prompted
to create one. However, it still is not necessary to do so.
It is possible to schedule
the meeting without an agenda and then add an agenda for the scheduled
meeting later. If an agenda still has not been added by the time the meeting
is started, the organizer or co-organizer starting the meeting is prompted
to create one. However, it still is not necessary to do so.
 (Optional)
Click the Tasks tab to add tasks
to the meeting. For more information, see "Managing
tasks".
 Click
Save and Close.
If you have enabled calendar integration, you are prompted to send meeting invitations when you save and close the meeting. For more information, see "Setting up calendar integration and Google options".
There are several options for notifying meeting attendees when you have scheduled a meeting from MeetingBooster. You can select which option to use from the Profile section; for more information, see "Setting up calendar integration and Google options".