With MeetingBooster, you can group any number of tasks using projects. This is very useful for tracking the progress of projects across meetings and agendas.
![]() A "project" in MeetingBooster
is merely a label used to group tasks. It does not require or include
any detailed procedures for running or managing projects.
A "project" in MeetingBooster
is merely a label used to group tasks. It does not require or include
any detailed procedures for running or managing projects.
![]() Projects
are used in a similar way to meeting series, but whereas meeting series
are used to organize meetings, projects are used to organize tasks. For
more information on meeting series, see "Working
with meeting series".
Projects
are used in a similar way to meeting series, but whereas meeting series
are used to organize meetings, projects are used to organize tasks. For
more information on meeting series, see "Working
with meeting series".
All members of a project in MeetingBooster can use the project to organize tasks. Projects are normally only visible to the members of the project; however, security roles may allow particular users to view and manage all projects in your MeetingBooster installation. For more information, see "Managing security roles".
![]() Click
the Tasks tab on the MeetingBooster
home page.
Click
the Tasks tab on the MeetingBooster
home page.
![]() Click
New Project in the menu. The following
dialog opens.
Click
New Project in the menu. The following
dialog opens.
![]() Enter
a name for the project in the Project
Name field.
Enter
a name for the project in the Project
Name field.
![]() Click
Add Member
Click
Add Member  ,
select the desired project members on the list, and click OK to add them
to the project. You can specify the user name in the Add
User field. As soon as you start typing, user names that match
your search text are shown. You can also select a user from your most
used or recently used users.
,
select the desired project members on the list, and click OK to add them
to the project. You can specify the user name in the Add
User field. As soon as you start typing, user names that match
your search text are shown. You can also select a user from your most
used or recently used users.
![]() (Optional)
Click the Tasks tab to create
tasks for the project. For more information, see "Managing
tasks".
(Optional)
Click the Tasks tab to create
tasks for the project. For more information, see "Managing
tasks".
Tasks created here are automatically associated with the project.
![]() Click
Save and Close.
Click
Save and Close.
![]() Click the Tasks
tab on the MeetingBooster home page.
Click the Tasks
tab on the MeetingBooster home page.
![]() Click Projects
in the menu.
Click Projects
in the menu.
![]() Click the name of the project you want to edit, and edit
the project as needed:
Click the name of the project you want to edit, and edit
the project as needed:
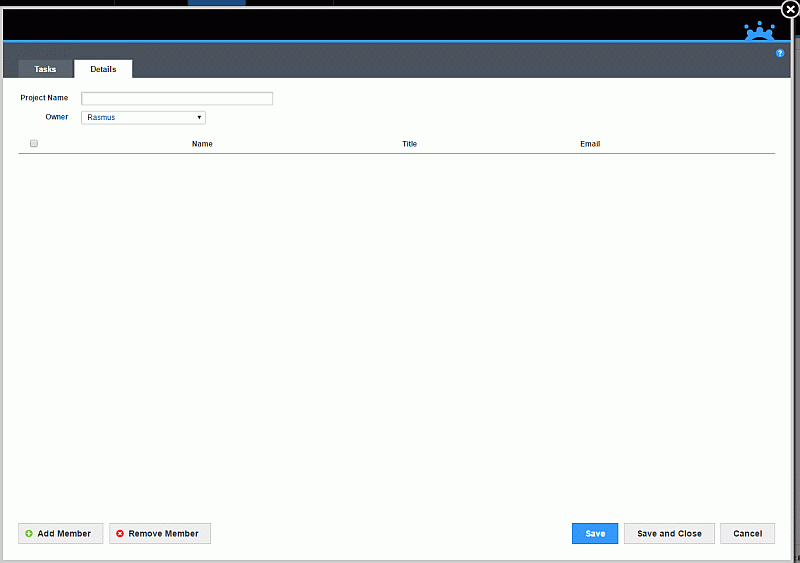
 On
the Details tab in the dialog,
change the project name or add or remove project members by clicking + Add Member
or - Remove Member
On
the Details tab in the dialog,
change the project name or add or remove project members by clicking + Add Member
or - Remove Member  .
.
![]() You cannot remove a member of a project
if project tasks have been assigned to the member. You need to change
the task owner of all related tasks before the member can be removed.
You cannot remove a member of a project
if project tasks have been assigned to the member. You need to change
the task owner of all related tasks before the member can be removed.
On
the Tasks tab in the dialog, create,
edit or delete project tasks.
![]() Click Save and Close.
Click Save and Close.
When a project has been created, the user who created it automatically becomes the owner of the project. Other members of the project, however, can also assign tasks to it.
![]() Locate
the task you want to assign to a project, and open it for editing as described
in "Editing tasks".
Locate
the task you want to assign to a project, and open it for editing as described
in "Editing tasks".
![]() Click
the Projects field, and select
one or more projects for the task in the dialog that opens.
Click
the Projects field, and select
one or more projects for the task in the dialog that opens.
You can specify the project name in the Find Project field. As soon as you start typing, project names that match your search text are shown. You can also select a project from a list of your own projects or all projects in the organization if your security roles allow this.

![]() Click
OK.
Click
OK.
![]() Click
the Tasks tab on the MeetingBooster
home page.
Click
the Tasks tab on the MeetingBooster
home page.
![]() Click
Projects in the menu.
Click
Projects in the menu.
![]() Click
the red cross
Click
the red cross ![]() next to the project
that must be deleted.
next to the project
that must be deleted.
![]() If a project is removed, all associations
to that project are removed from all related tasks. The tasks themselves
are not deleted.
If a project is removed, all associations
to that project are removed from all related tasks. The tasks themselves
are not deleted.