When your administrator adds you to your organization's MeetingBooster installation, he or she may send you a welcome email containing a link to the MeetingBooster Welcome wizard. The Welcome wizard walks you through the steps that you need to complete before you can start using MeetingBooster.
![]() Click the link in the
welcome email to launch the Welcome wizard.
Click the link in the
welcome email to launch the Welcome wizard.
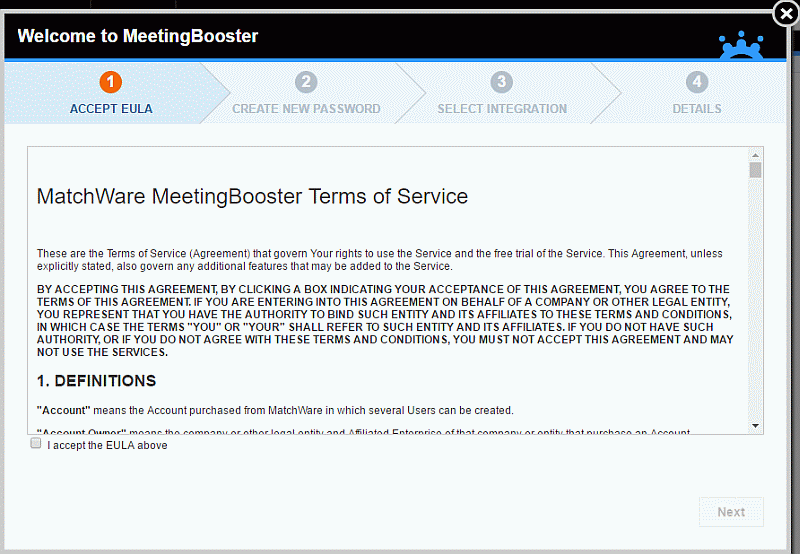
![]() Navigate
through the Welcome wizard to complete all necessary steps:
Navigate
through the Welcome wizard to complete all necessary steps:
![]() Accept
the end-user license agreement (EULA).
Accept
the end-user license agreement (EULA).
![]() Choose
a password.
Choose
a password.
![]() Select
a calendar integration option, and configure it.
Select
a calendar integration option, and configure it.
![]() If you are using Outlook, you can download the Outlook plug-in from the
Welcome wizard and install it on your computer unless IT policies in your
organization dictate otherwise. For more information, see "Installing
the Microsoft Outlook plug-in".
If you are using Outlook, you can download the Outlook plug-in from the
Welcome wizard and install it on your computer unless IT policies in your
organization dictate otherwise. For more information, see "Installing
the Microsoft Outlook plug-in".
At any stage, you can click Back to go back and change your settings.
![]() Click
Done to complete the wizard.
Click
Done to complete the wizard.
You are automatically logged into MeetingBooster and can start using the application.
![]() You can also set up your calendar integration options from the Admin section,
and you can always change them from here as described in "Setting
up calendar integration and Google options". For information
on setting up or changing other options, see "Setting
up your preferences".
You can also set up your calendar integration options from the Admin section,
and you can always change them from here as described in "Setting
up calendar integration and Google options". For information
on setting up or changing other options, see "Setting
up your preferences".
![]() The available calendar integration options have been selected by the administrator
for your organization. For more information, see "Setting
calendar integration options" in the Administrator Guide.
The available calendar integration options have been selected by the administrator
for your organization. For more information, see "Setting
calendar integration options" in the Administrator Guide.
If for some reason you do not complete the Welcome wizard, a Profile Incomplete message is shown in the menu when you log into MeetingBooster.

![]() Click
the message to relaunch the Welcome wizard and enter the missing information.
Click
the message to relaunch the Welcome wizard and enter the missing information.