 Click
Settings
 On the MeetingBooster site, you can change your profile information and user preferences from the Profile section.
 Click
Settings
 ![]() and select Profile.
and select Profile.

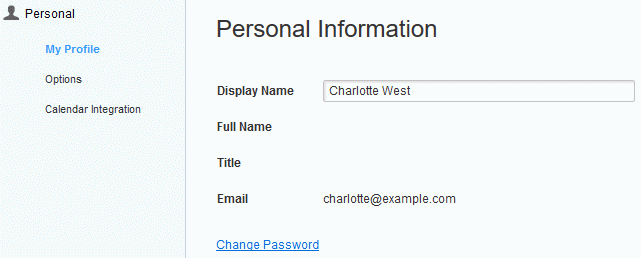
 Enter
a new name in the Display Name
field.
![]() Your
display name is used to identify you everywhere in the organization's
MeetingBooster installation. To avoid confusion and misunderstandings,
do not choose a name that is already in use by someone else. If in doubt,
ask your administrator whether a given name is already in use.
Your
display name is used to identify you everywhere in the organization's
MeetingBooster installation. To avoid confusion and misunderstandings,
do not choose a name that is already in use by someone else. If in doubt,
ask your administrator whether a given name is already in use.
 Click
Save.
 Click
Change Password.

 Enter
your old password and the new one, and retype the new password to confirm
it.
 Click
Save.
Changes take effect immediately.
![]() Remember your password. If you lose
it, you will not be able to access your MeetingBooster account. If you
forget your password but still remember your email address, click Forgot Password? on the MeetingBooster
login page. Otherwise, contact your administrator.
Remember your password. If you lose
it, you will not be able to access your MeetingBooster account. If you
forget your password but still remember your email address, click Forgot Password? on the MeetingBooster
login page. Otherwise, contact your administrator.
 Click
Options in the menu.

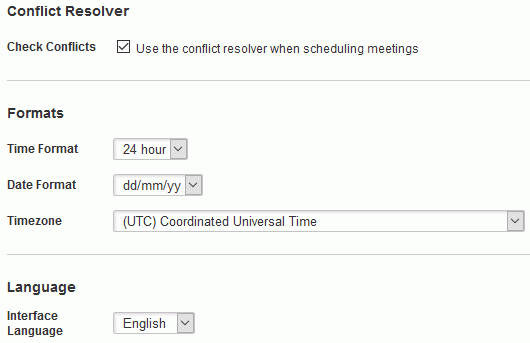
 Deselect
the Use the conflict resolver when scheduling
meetings check box if you do not wish to use the Conflict Resolver.
For more information, see "Inviting
attendees".
![]() The system administrator
may deselect this option for all users in the organization, in which case
the check box is grayed out and cannot be selected.
The system administrator
may deselect this option for all users in the organization, in which case
the check box is grayed out and cannot be selected.
 Select
your desired time and date format and your time zone on the drop-down
lists.
 Select your desired interface language on the drop-down
list.
![]() This only changes the language
of the MeetingBooster software; it does not change your browser's language
settings. If your browser's spell checking feature is set to a different
language than the one you intend to use in MeetingBooster, text that you
enter in MeetingBooster may be flagged as wrongly spelled. See the documentation
for your browser for details on how to change its language settings.
This only changes the language
of the MeetingBooster software; it does not change your browser's language
settings. If your browser's spell checking feature is set to a different
language than the one you intend to use in MeetingBooster, text that you
enter in MeetingBooster may be flagged as wrongly spelled. See the documentation
for your browser for details on how to change its language settings.
![]() The default language is set by the system
administrator. For more information, see "Setting
system options".
The default language is set by the system
administrator. For more information, see "Setting
system options".
 Click
Save.
From the Profile section, you can also set up calendar integration. For more information, see "Setting up calendar integration and Google options".
 Click
the Meetings, Tasks
or Dashboards tab.
or
 Click
the MeetingBooster icon
 ![]() .
.
![]() Depending on your security roles, you
may also have access to the Admin section when you click Settings.
From the Admin section, you can configure various MeetingBooster settings.
For more information about additional options in the Admin section, see
the Administrator Guide of this documentation.
Depending on your security roles, you
may also have access to the Admin section when you click Settings.
From the Admin section, you can configure various MeetingBooster settings.
For more information about additional options in the Admin section, see
the Administrator Guide of this documentation.